WEEK 8: History Brush and Retouching
Using one of your images from your portrait assessment make the image black and white. Then using the History brush restore a part of the image back to the original colour
This is my original image to edit
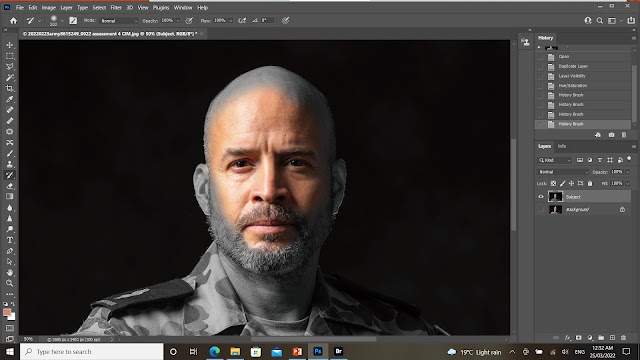
My two main tools on my right bar for this job are the layers and the history windows.
I’m creating a snapshot, duplicate the layer and give a name.
Using the HUE/saturation tool, I desaturate the image reducing the amount to zero, increase the hue and finally reduce a bit the lightness. Then select my history brush tool, start to paint on and see how the photo goes gradually back to the snapshot, back to his original colour.
The final photo
-:-
Using a new image, edit out skin imperfections using the History Brush
Retouching is the polishing of the image and it’s a painstaking job that requires time and patience. Usually completed after basic adjustments, such as color correction, exposure, contrast, cropping, etc. With retouch you can rid of any blemishes that degrade your image. You will be able to transform and enhance the general appearance of the person in the image completely.
THANKS FOR WATCHING!


Comments
Post a Comment